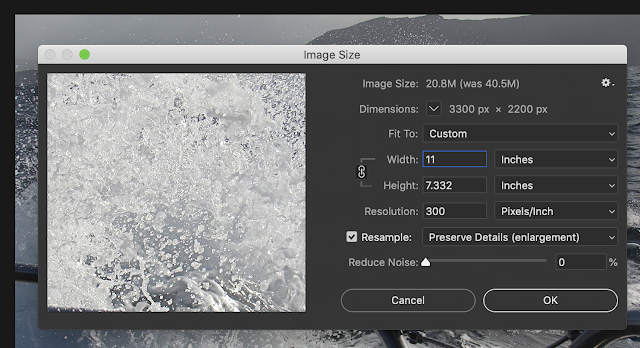
2. If resizing to fit your image on paper, you may do so automatically in the print dialog box. If you chose to do it in Photoshop, please make sure to use a resolution of 220-300 ppi if possible, without upsizing the overall resolution or file size.

3. Go to file - Print. Select the Epson Sylus 7880 Printer. Make sure you select the right printer or the rest of this will not work out the same.

4. Click on print settings to open the printer dialog box. Click on the correct paper size. Underneath that, where it says layout, click on that to pull up the print settings. Select the paper you are using.

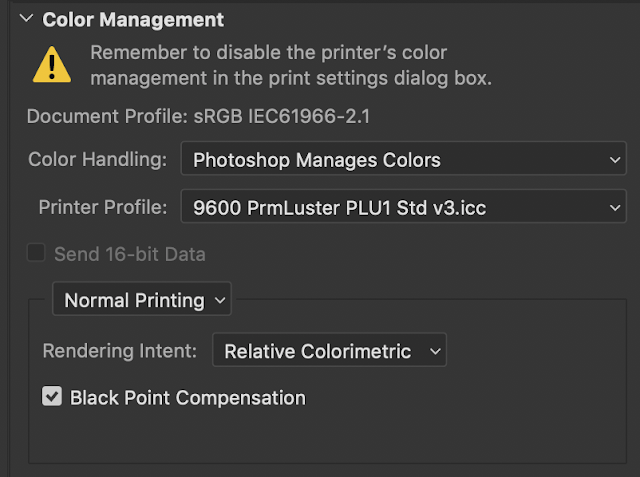
5. Exit out of the print settings, and go back to the Photoshop print window. Where it says color handling. Make sure it says Photoshop Manages Color. Make sure you select the ICC profile that corresponds to your paper. This will make it so your print matches what you see on screen (as close as possible).


